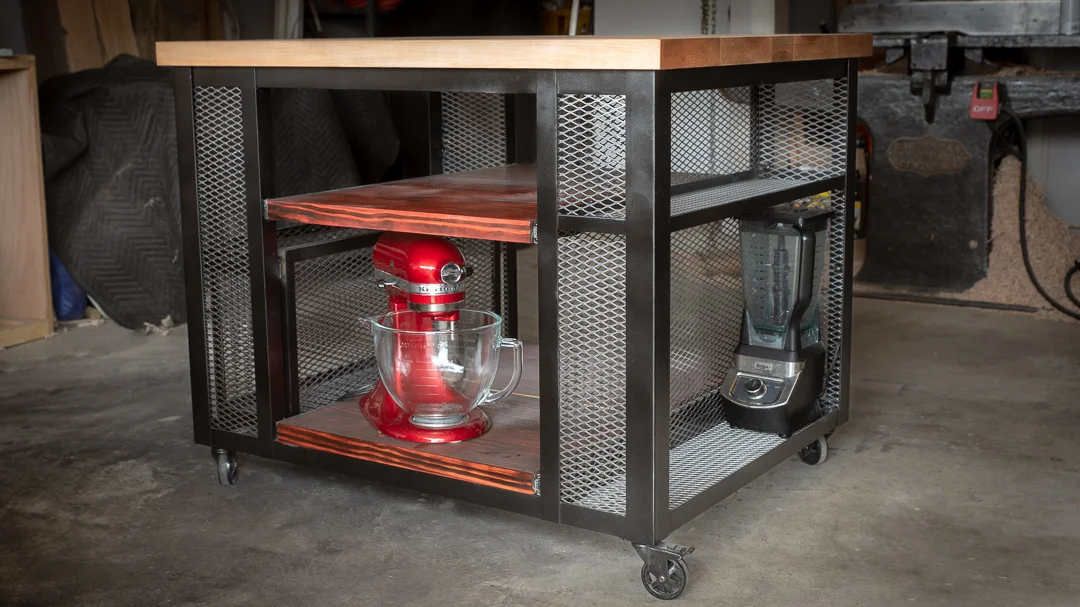
Industrial Modern Coffee Table
I teamed up with my buddy Richard from 42 Fabricate to make a coffee table! This video is about building the walnut table top, finishing the base, and turning the two into one. Be sure to check out his video on how he built the base and the crazy story behind making this collaboration happen!
This post contains affiliate links, for more information see my disclosures page.
Check out the tools I use.
10% off any Total Boat product with code "YouCanMT2"
Materials Used:
Starbond CA Glue use “YCMT2” for 10% off
My part of this build was pretty straight forward, just glue these book matched boards together and finish them! Of course, there ended up being a bit more. I had to build a temporary base and assemble the collaboration base after Richard mailed it to me, then put the two together. Here’s how I made the top.
Milled the live edge walnut slabs
I wasn’t sure how rough to leave these. I was really thinking of going with a rough skip planed kind of look. So, I started with just edge jointing the boards, and then did some face jointing.
It didn’t take long though to realize that the boards were too warped to keep them very rough. So I milled ‘till I had a flat face, and then started sending them through the planer.
2. Glue together
The first jointing was a bit rough. So before the glue up I clamped both boards together and ran them over the jointer to get a glue jointed edge. That way they were both flat and by running them through together, any error in my jointer fence would be offset.
For the glue up, I just used cauls and Titebond.
3. Stabilize and Finish the Top
These boards had some pretty punky sections, and I wanted to keep the rotted bits at the bottom. To keep the wood from just coming apart, it was going to need some help. So I mixed up some TotalBoat Penetrating epoxy and applied two coats. Making sure to really saturate the punky areas, and get into all the crevices of the rot.
The penetrating epoxy had a weekend to dry before sanding it down, and then it got finished with TotalBoat Halcyon. However, Halcyon is a gloss finish and I really wanted a satin, so after it dried I knocked back the gloss with some extra fine steel wool.
4. Assemble the Base
For ease of shipping, Richard sent me the base in two pieces with a spine to add. I had to do a little bit of cutting to get the angle correct. Then it was just a matter of welding the two pieces together and adding the spine to lock it all together. I also went ahead and hit it with some clear spray lacquer to help prevent rusting.
5. Attach the Top to the Base
To attach the top I just drilled some holes through the top webbing of the base. There won’t be much expansion on a top this small, but I still oversized the holes a bit so the screws will have some wiggle room. Then I just used some self-drilling screws with washer, and boom! It was done!