Restoring an Old Chair / Weaving a Seat
I had some worn chairs that were ready for a make over. This time I go over how I stripped, re-finished, repaired, wove a new seat from webbing, and generally brought new life to an old chair!
This post contains affiliate links, for more information see my disclosures page.
Check out the tools I use.
Materials:
This first step is as simple as you’d think, take the chair apart. Doing so proved a bit more difficult than I expected because the screws were really bent. But, some vice grips were up to the challenge.
With the seat off the base, I was able to remove the old webbing. It was secured around small wooden dowels that were nailed to the frame.
Instead of trying to cut all the webbing free, I just removed, kind of broke, the dowels away from the frame until the webbing was free.
Then I got to the exciting task of pulling nails After I pulled all the nails that would come out, I came back with a hammer and tapped flush all the nails that broke.
The seat frame sides consist of two pieces of wood held together by a floating tenon. One of those came loose so I used some 5 minute epoxy to glue it back together. Wood glue would have worked just as well, but the 5 minute epoxy dries to a working hardness much faster.
While the epoxy dried, I set to the other super fun task of sanding the base. A smaller sander would’ve been better, but all I have is this 6” so it’s what I used. Every where I couldn’t reach with the sander, I hand sanded the old varnish away.
The epoxy was cured by the time I finished the base, so then I sanded the varnish off the exposed bits of the seat frame and some of the really rough spots.
Next up I refinished the exposed bits of the seat frame with a few coats of spray lacquer, and sprayed the base off camera.
Also off camera I cut all the webbing strips with a razor knife and seared the ends with a torch to help keep them from unraveling. I started the webbing by adding the spacer strips on the top and bottom of the chair, then moved on to the horizontal pieces. I held everything in place using two 1/4” staples from an electric stapler I picked up for this job, and I’m really glad I did, hand squeezing staples into this chair wouldn’t been a real hand work out.
The only real trick here is pulling the strips taut and make sure they’re stay snug against each other so there aren’t gaps later.
Next is running the vertical strips that make the weave. It’s pretty simple, the strips just weave over then under each horizontal strip. The hardest part is remembering to alternate how each strip begins. The vertical first strip I did went over the first horizontal strip it met, so when I did the second vertical strip, I started by going under the first horizontal strip. That’s what gives the weave it’s strength and appearance.
Instead of screwing the frame back to the base, I decided to do some accents and pegged the two together with stainless steel pins. A dab of CA glue holds them in place, I didn’t bother trying to epoxy them in place because next I’ll drive some screws through the underside of the chair into the frame that’ll keep the chair from shifting.
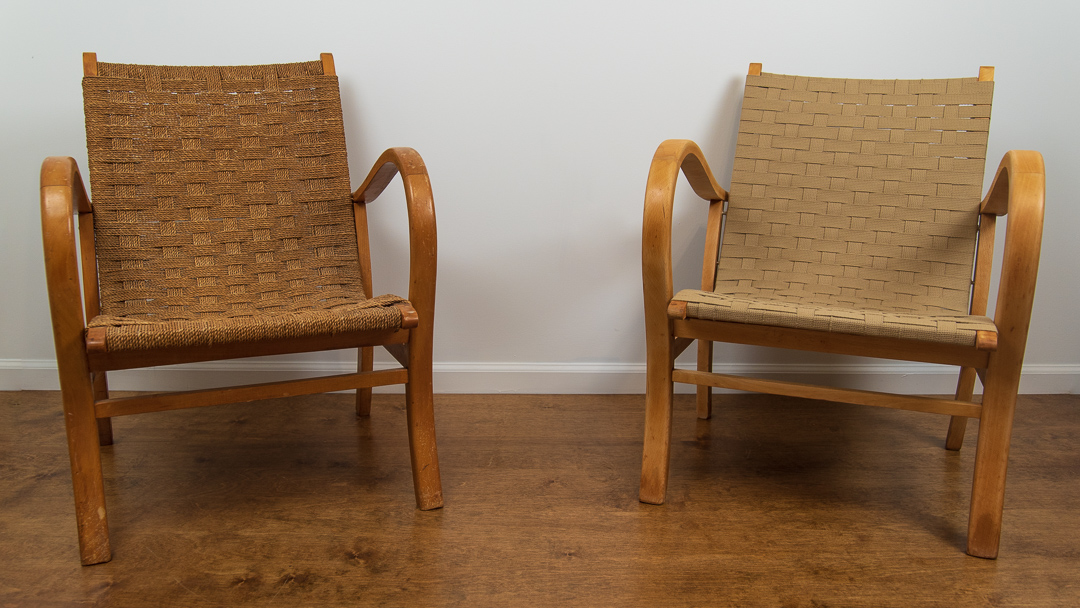
And with that, the chairs were done.