Murphy Bed Featuring a Stay Level Desk
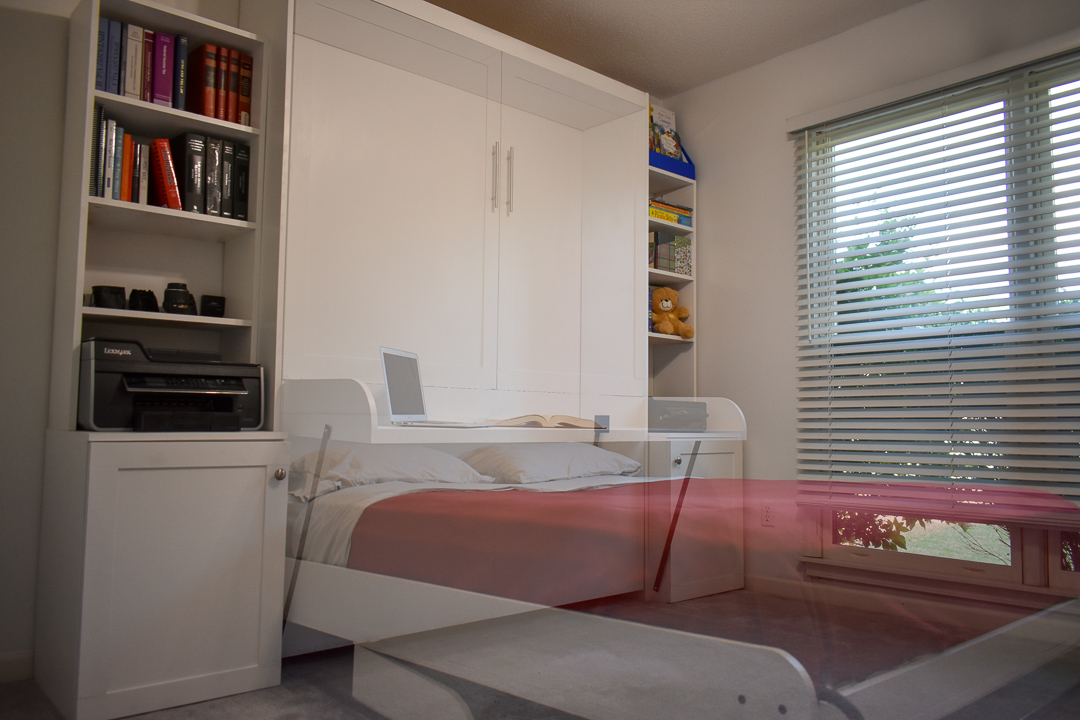
This time I make a Murphy bed with a stay level desk! The desk turns the room into a true multifunction space, and with the stay level feature I don't have to clear it off before pulling the bed down. I also flanked the bed with cabinets and shelves for lots of storage!
This post contains affiliate links, for more information see my disclosures page.
Check out the tools I use.
Like most projects, this Murphy bed build started with breaking down my material at the table saw. I ripped some 1x2s out of a 2x12 for part of the bed frame, but everything else in this project will be made from plywood.
The home center broke down the plywood for me some when I picked it up, but I’m going to break it down some more with my circular saw and straight edge before taking it to the table saw. These circular saw cuts are slightly larger than I need, later I’ll recut this edge on the table saw to exact size.
I’m following the plans that came with the Murphy bed kit for this build. To keep track of all my pieces, I label them and mark them off the cut list after I cut them to final dimension. This really pays off later, especially with how many pieces this build needs.
Prime Tools sent me the hardware kit for this Murphy bed, my only obligation is to build it. But, I have to say I highly recommend this kit because of the instructions, they blew me way with how detailed and thorough they are. It even came with a DVD. Whatever your skill level is, if you can follow directions, you can build this.With all the pieces cut, I go ahead and drill all the pocket holes and then start assembly.
I’m applying edge banding on all the exposed edges of the plywood to get a better paint job. This is my first time using iron on edge banding and I was surprised by how easy and fast it was.With the Murphy bed pretty much ready to be installed, I switch to building the cabinets and shelves that will flank the Murphy bed. These are my own design.
One thing I have learned about building pocket hole cabinets is to pay cost attention to which side you put the pocket holes on so they stay hidden. Some forethought here will prevent having to plug any holes.
Around now is when this build started getting challenging. I realized that I cut the sides too short by about an inch. I was able to work around it by mounting the header a little high, and later I tacked on some additional plywood to cover the gap.
The next surprise came when I got the Murphy bed against the wall. At first I thought I’d somehow really messed up the sides, but turns out this wall just has a crazy bow in the middle of it, you can see how much my 4’ level rocks on it.
Off camera I used some shims to pad out the distance and screwed the header into several studs to secure the Murphy bed to the wall. I opted for this because I knew the cabinet and shelves would cover the gaps between the Murphy bed sides and the wall.
If I wasn’t installing the cabinets, I would have scribed the sides to the wall, or scribed a piece of trim to the wall to cover the gaps.
Also, while installing the Murphy bed I busted the first foot piece I made, so I made a new one from aluminum tube with some wood epoxied into it. Although I have to admit, I think this does look a lot better.
With the Murphy bed and cabinets installed, I moved on to the desk. The construction of it was straight forward and I attached it to the bed with a 4’ piano hinge. But when I went to install it, I realized I made the desk too wide. I went ahead and installed it, but off camera I took it off, cut it down, and reinstalled it.
Finding the right location and length for the struts to keep the desk level was a lot of trial and error. I'd honestly recommend just buying a kit for a stay level desk.
Now it’s time for finishing touches, like installing the doors, adding trim, and pulls.